[Spring3.0] AOP (관점 지향 프로그래밍)
by 무작정 개발2022.03.28(65일 차)
이번에는 Spring AOP에 대해 정리할 것이다.

오늘의 수업 내용
AOP (Aspect Oriented Programming) - 관점 지향 프로그래밍
AOP 란 Aspect Oriented Programming의 약자.
문제를 바라보는 관점을 기준으로 프로그래밍하는 기법이며, 관점 지향 프로그래밍이라 불린다.
- 불특정 다수의 객체(클래스, 메서드)에 코드를 탈출할 수 있게 만드는 기능
- 공통적으로 사용되는 부분(트랜잭션, 예외처리)을 별도로 분리하는 기술
- 공통된 기능을 재사용하는 기법
1. 용어
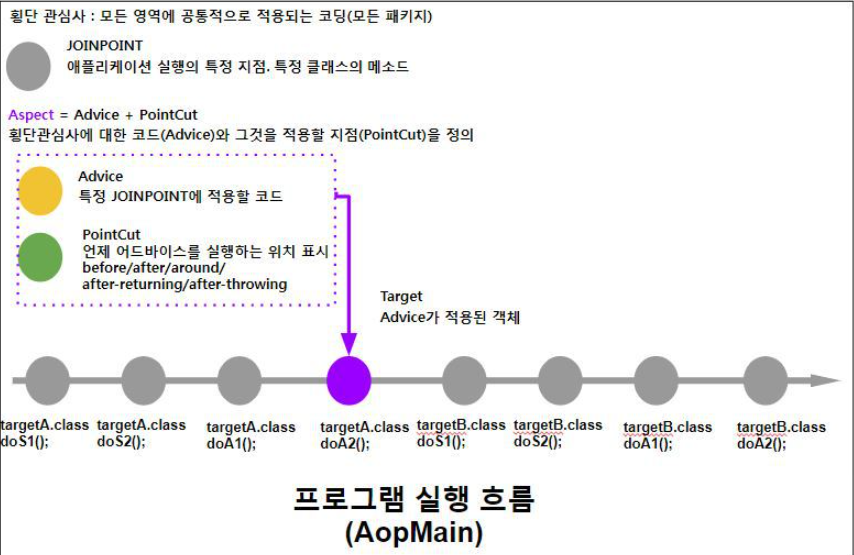
횡단 관심사(Crosscutting Concerns)
- 모든 영역에 공통적으로 적용
- 모든 클래스를 가로로 관통하여 횡당 할 수 있는 관심사, 특정 클래스 혹은 메서드에 적용 가능
- 중간중간 삽입되어야 할 기능들(로깅, 트랜잭션 등) / 주로 메서드 단위로 확인
조인 포인트(JoinPoint)
- AOP에서 애플리케이션이 실행될 특정 지점을 의미
- 어드바이스를 실행할 수 있는 지점 -> 포인트 컷의 후보
어드바이스(Advice)
- 지정한 특정 조인 포인트에 실행할 코드
- 종류 : before / after / after returning / after throwing / around
포인트 컷(PointCut)
- 어드바이스를 실행하는 조인 포인트
- 어드바이스를 실행하는 시간(위치)을 표시
에스 팩트(Aspect)
- 어드바이스 + 포인트 컷
- 어드바이스와 포인트 컷을 합쳐 횡단 관심사에 대한 코드와 이를 적용할 위치를 지정 (무엇을 언제 할지 정의)

AOP 예제 풀기
이제 예제를 활용하여 AOP의 개념을 잡아볼 것이다.
1. 레거시 프로젝트 생성
- File -> New -> Legacy Project -> 프로젝트 이름 : SpringAop
2. AOP lib(라이브러리) 설치
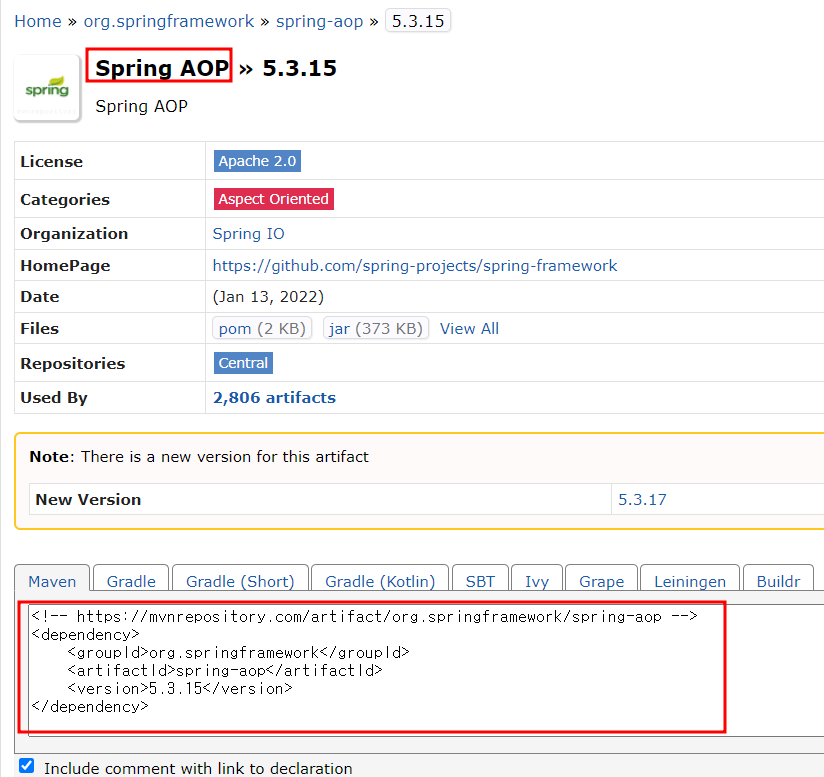
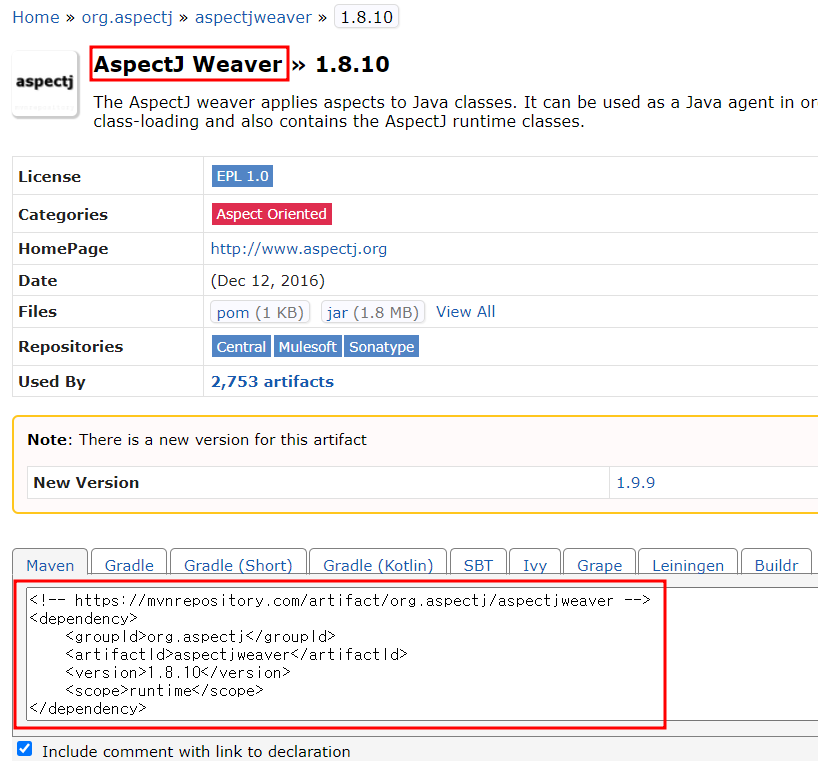
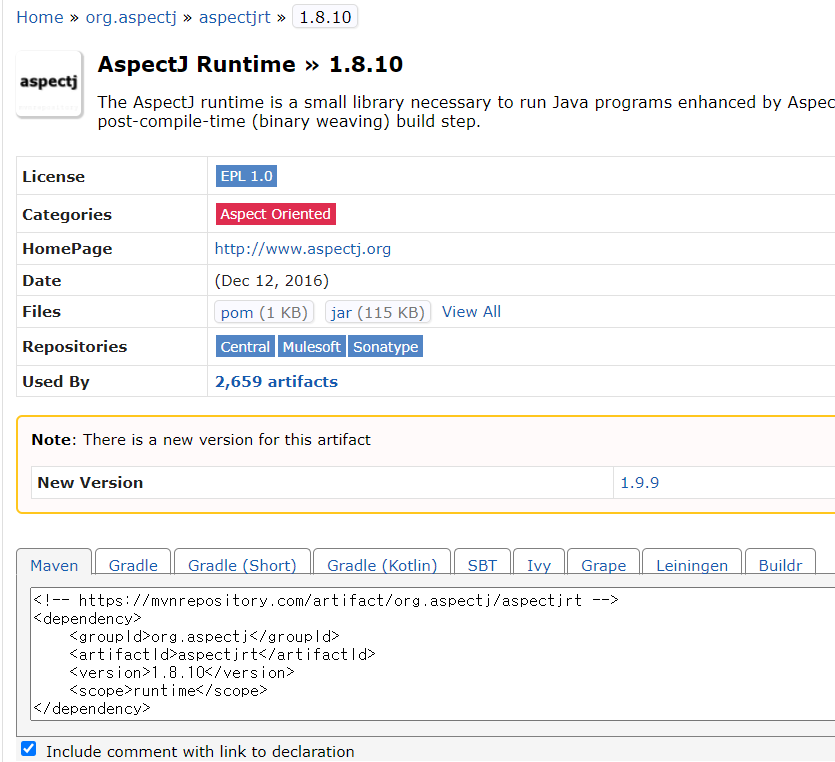
- 이전에 배운 Maven으로 라이브러리를 설치한다. 총 4개
- pom.xml에 작성해서 자동으로 lib 추가


pom.xml
- Spring AOP만 다른 lib랑 다르게 현재 쓰고 있는 스프링 버전을 맞춰야 해서
- <version>{spring.framework.version}</version>
<!-- spring-aop -->
		<dependency>
   		 <groupId>org.springframework</groupId>
    		<artifactId>spring-aop</artifactId>
    		<version>${spring.framework.version}</version>
		</dependency>

		<!-- aspectjweaver -->
		<dependency>
    		<groupId>org.aspectj</groupId>
    		<artifactId>aspectjweaver</artifactId>
    		<version>1.8.10</version>
		</dependency>

		<!-- aspectjrt -->
		<dependency>
   		 	<groupId>org.aspectj</groupId>
   		 	<artifactId>aspectjrt</artifactId>
    		<version>1.8.10</version>
		</dependency>

		<!-- AOP Proxy cglib -->
		<dependency>
    		<groupId>cglib</groupId>
    		<artifactId>cglib</artifactId>
    		<version>3.2.4</version>
		</dependency>
3. 클래스 생성
- 위치 : com/main/java > com.exe.aop
- targetA, targetB 클래스 생성
targetA 클래스
package com.exe.aop;

public class TargetA {

	public void doSomething1() {
		System.out.println("TargetA.doSomething1");
	}

	public void doSomething2() {
		System.out.println("TargetA.doSomething2");
	}

	public void doAnother1() {
		System.out.println("TargetA.doAnother1");
	}

	public void doAnother2() {
		System.out.println("TargetA.doAnother2");
	}

}
targetB 클래스
package com.exe.aop;

public class TargetB {

	public void doSomething1(String str) {
		System.out.println("TargetB.doSomething1:" + str);
	}

	public void doSomething2() {
		System.out.println("TargetB.doSomething2");
	}

	public void doAnother1() {
		System.out.println("TargetB.doAnother1");
	}

	public void doAnother2() {
		System.out.println("TargetB.doAnother2");
	}

}
4. 실행할 시점에 따른 클래스 파일 생성 (MyBeforeAdvice 클래스 생성)
- before : 메서드 호출 전
- after : 메서드 호출 후
- after returning : 메서드가 정상적으로 실행된 후
- after throwing : 메서드를 실행하는 도중 에러가 발생하는 경우
- around : before + after / 메서드 앞 뒤로 실행
위는 5개의 어드바이스 종류이다. 이 중에 before advice에 대해 정리해보겠다.
MyBeforeAdvice.java
package com.exe.aop;

public class MyBeforeAdvice {

	public void beforeMethodCall() {

		System.out.println("메서드 실행 전(BeforeAdvice)..");
	}

}
이제 app-context.xml로 넘어가서 작성을 해볼 것이다.
- expression="excution(public void com.. aop.*.*(..))"
- excution(메서드 접근 지정자 반환 값 패키지 이름. 클래스 이름. 메서드 이름(매개변수)
- (..) : 괄호 안의.. 은 뭐가 와도 상관없다는 뜻
- com.. aop : com과 aop 사이에 있는.. 은 맨 앞은 com / 맨 뒤는 aop이고 중간은 뭐가 와도 상관없다는 뜻
<!-- 어드바이스 -->
<!-- 객체 생성 -->
<bean id="beforeAdvice" class="com.exe.aop.MyBeforeAdvice"/>

<!-- Before Advice -->
<aop:aspect ref="beforeAdvice"> <!-- ref : aspect를적용할 객체 -->
	<aop:pointcut id="beforePointcut" <!-- 실행할 행동 -->
		expression="execution(public void com..aop.*.*(..))" /> com.누구나.aop
	<aop:before method="beforeMethodCall"
		pointcut-ref="beforePointcut"/> <!-- 실행할 시점 -->
</aop:aspect>					<!-- method :  -->
						<!-- aop:pointcut의 id와 ref는 같아야 한다 -->
4. AopMain 클래스 생성
package com.exe.aop;

import org.springframework.context.support.GenericXmlApplicationContext;

public class AopMain {

	public static void main(String[] args) {

		GenericXmlApplicationContext context =
				new GenericXmlApplicationContext("app-context.xml");

		TargetA ta = (TargetA)context.getBean("targetA");

		ta.doSomething1();
		ta.doSomething2();
		ta.doAnother1();
		ta.doAnother2();

	}

}
Main에 있는 4개의 각 메서드가 호출되기 전에 "메서드 실행 전(BeforeAdvice).."가 먼저 출력된다.
이게 BeforeAdvice이다.
위의 방법을 Annotation(어노테이션)으로 할 수 있다.
위의 예제를 Annotation(어노테이션)으로 변경하기
어노테이션으로 변경하면 코드가 매우 간결해진다.
먼저 app-content.xml을 보겠다.
<?xml version="1.0" encoding="UTF-8"?>
<beans xmlns="http://www.springframework.org/schema/beans"
	xmlns:xsi="http://www.w3.org/2001/XMLSchema-instance"
	xmlns:context="http://www.springframework.org/schema/context"
	xmlns:aop="http://www.springframework.org/schema/aop"
	xsi:schemaLocation="http://www.springframework.org/schema/beans
	https://www.springframework.org/schema/beans/spring-beans-3.0.xsd
	http://www.springframework.org/schema/context
	https://www.springframework.org/schema/context/spring-context-3.0.xsd
	http://www.springframework.org/schema/aop
	https://www.springframework.org/schema/aop/spring-aop-3.0.xsd">

	<description>Example configuration to get you started.</description>

	<context:component-scan base-package="com.exe.aop" />

	<!-- 이번엔 하단에서 했던 노가다를  어노테이션으로 사용 -->
	<aop:aspectj-autoproxy/>

</beans>
처음에 했던 app-content.xml에서 사용한 코드는 지우고 <aop:aspectj-autoproxy/>만 작성하면 된다.
다음으로 MyBeforeAdvice 클래스를 변경해볼 것이다.
package com.exe.aop;

import org.aspectj.lang.annotation.Aspect;
import org.aspectj.lang.annotation.Before;
import org.springframework.stereotype.Component;

@Aspect //객체를 IoT까지 실행 = <aop:aspect ref="beforeAdvice"> </aop:aspect>
@Component // bean 객체 생성 = <bean id="beforeAdvice" class="com.exe.aop.MyBeforeAdvice"/>
public class MyBeforeAdvice {

	//실행시점 및 적용할 메서드 지정
	@Before("execution(public void com..aop.*.*(..))")
	public void beforeMethodCall() {

		System.out.println("메서드 실행 전(BeforeAdvice)..");

	}

}
이렇게 어노테이션을 사용하면 손쉽게 작성할 수 있다. 어노테이션을 사용해도 이전에 나온 결과와 동일하게 출력된다.
더 많은 예제와 소스코드는 하단 GitHub 링크 참고
https://github.com/chaehyuenwoo/Spring3.0/tree/main/SpringAOP/src/main/java/com/exe/aop
GitHub - chaehyuenwoo/Spring3.0: Spring Framework 3.0버전_STS 3 IDE 사용
Spring Framework 3.0버전_STS 3 IDE 사용. Contribute to chaehyuenwoo/Spring3.0 development by creating an account on GitHub.
github.com
'Back-End > Spring Legacy' 카테고리의 다른 글
| [Spring3.0] Spring Web View, 파일 업로드, 파일 다운로드 (0) | 2022.03.29 |
|---|---|
| [Spring3.0] MVC: Spring3.0 + MyBatis 게시판 (2) | 2022.03.29 |
| [Spring 3.0] LomBok 으로 getter/setter 생성 (0) | 2022.03.28 |
| [Spring 3.0] 스프링 3.0 + MyBatis 연동 (0) | 2022.03.27 |
| [Spring 3.0] 스프링JDBC (0) | 2022.03.26 |
블로그의 정보
무작정 개발
무작정 개발